The full self-build DIY insulated garden office write-up for remote, nomad, home working, music or writing studio, home trading setup on a budget (doubling as garden room, home cinema)
EDIT: This is a re-post from an old site where Amazon affiliate links justified posting the whole write-up. They are still included as it was originally, just so you know. It’s a lot of work for very little gain to remove them! It was originally written in 2017. The office hasn’t failed me since!
What’s all this about then
This post details how this DIY beginner built a garden office that’s warm and comfortable, and hopefully productive, all year round. To be used for work from home and of course for entertainment. All on a budget. Including the plastering.
If you’re one of the estimated millions of home-working professionals, with 2.5m estimated to run businesses from home in the UK alone, IMHO you should consider getting the time and money together to build yourself an office to get out of the house and have a fixed, dedicated ‘work area’. It also doubles as a cinema and garden room as a bonus.
The office described in this post is in a long garden (ex-council property, with 40x8m garden designed for post-war veggie growing!) and takes up the final 10m of length. DIY is still probably the cheapest way to get a large, warm space of this kind at present. It has stood through 2 gales (thanks for the testing, 2017 Atlantic storms!) and is fully watertight. It has also been worked in in sub-zero temperatures on oil-filled heaters, fully testing out the insulation also in its first few weeks of life.
The only thing I wouldn’t advise you to take on is of course the electrics. Leave that to a professional and be sure to cover that section to think about the project schedule and placement of sockets and cables etc. Likewise for any running water.
The guide should save you decent amounts time, money and stress by preparing you for the things that became all too obvious to me - only after I experienced them. It’ll also save you many hours researching and digesting loads of information, because I’ve already done a lot of it for you.
You can use it to draw up a design of your own, based on the basics I’ll set out, reducing (or enlarging) the size and scope of the project to fit your budget or local regulations. For instance, you can leave out the plasterboards, insulation, vapour barriers, electrics and just opt for a solar-powered (or not) garden room, saving some ~£2000 for 6x5, or saving even more by halving the size.
I’ll include every tool required for completeness, in case you’re missing anything in your collection.
This guide was going to be a book, and may still be in the future, but for now I’m posting it here to polish it up using reader feedback. Let me know if there’s anything you want to see added or amended through the contact form in the sidebar.
EDIT, March 2021: You can now get a complete guide, including photos and 3D plans, as well as a cutting and parts list, including a cost breakdown for each list item. These are available in Model 1 (6x5m), Model 1A (5x3m) and custom versions at: Model 1/1A guide and parts lists
These are improved models over what is set out below. A joiner with 25+ years of experience has further reinforced the design and I’ve fixed some of the minor issues I had with my build (edges for plasterboards!), as well as ensuring it stays under 3m in height, regardless of how your garden falls.
Also available is a higher spec model, still under £10k, the Model 2. It includes a built-in side shed, bi-fold doors, a picture window with window-seat and much more. That’s available here: Model 2/2A guide and parts lists.
Why build your own?
Does it make sense to make a dedicated workspace away from your house?
It all depends on your situation. If you already work from home, say as a freelancer or consultant, and/or you plan to do so for the next few years, you’re probably considering this more seriously than someone who’d like to work from home one day in the future, maybe. Or if you’re a digital nomad, travelling the world with your work, you’re less likely to need one right now, but maybe when you return home you might like a dedicated space.
My situation involves working from home full-time, as I have been since 2004. I also wanted a space for entertainment, relaxation and socialising, that was away from house. The end of the garden contained rarely seen flowerbeds and was a wide open space that was pretty much going to waste. OK, the insects, birds and small mammals appreciated it, but we’re building other spaces for them around the garden. The space we had was calling out for it.
Some backstory…
We had a child in 2014 and I managed to continue to work in the spare room for the first year, then an office 30 minutes away in the second year as things started to get noisier at home. Don’t get me wrong, I want to maximise the amount of time I spend with the little one, but work enables that, so the separation helps to draw the lines and make sure I can do my best work.
The office I leased was a newly renovated EU-funded former Rolls-Royce building cost around £150 a month. Very cheap for the comfort level and services offered. It just wasn’t ever ‘my space’. I’ve come to learn that I need my own space to be most comfortable and productive. It was also just 3x3m, which doesn’t give a lot of room for movement once the furniture is in. Located on a noisy estate with dirtbikes ripping around most days, by the time the lease was up for the first year I had decided it would be more cost-effective if I finally built a decent workspace at home. It’d help to avoid that hour’s drive in traffic every day too.
Other reasons people might build an outdoor home office, or an insulated garden building, include wanting a space to write, draw, produce music, be creative or socialise. Somewhere they can disconnect from their usual habits and routines in the house, somewhere to come and read and relax and get away from it all. Without going too far.
I ended up building a home office with very little in the way of plans. This post will help you to do the same, just with more planning and more realistic expectations than I had in terms of price, time and materials required. You are free to alter the setup at any time to suit your building and space, just be wary of each subsequent step and how it will fit into your new plan.
Mindset and perspective
Be prepared for a lot of effort. Your mindset has to remain positive because it’s very easy to be disheartened half-way through the build. Take small steps. Don’t let yourself get overwhelmed. Call on experienced people for support. Even if it doesn’t feel like it’s going forward, it is. It’s just hard to see it when you’re doing the building. It’s a very rewarding process, but you just have to power through to get to that rewarding part.
Then some sections of the project make it look like you’ve made a massive leap forward and give morale a real boost. But don’t get ahead of yourself or you can get easily disheartened when you find another weekend’s work to do. Then another, etc.
Remember why you’re doing it. Don’t let either the praise or the criticism get to you. Both ‘well done’ and ‘I would have done it this way…’ can be equally as damaging to morale. Stick to the plan. Fit for purpose is the goal. Anything else is a bonus. As a side benefit, you will most likely lose weight and build muscle if you do this over a short period of a few months. Keep up your food and drink! Take breaks. Bend at the knees. I could go on… but basically look after yourself and keep a level head.
The timescale for me was weekends for 3 months, essentially. Feel free to do more or less depending on your skill and energy levels. My skill levels are low, but energy high, so I powered through most of the days spent on it.
There are a few drawbacks to building your own office/garden room. Namely lost family time, and a requirement for a lot of physical effort. As something that will stand for years, however, offering lots of enjoyment, these short-term sacrifices can be weighed up against the long-term gain.
Benefits are the huge cost savings over buying a pre-made design, additional space, increased comfort, understanding of how to fix and repair and even a house price increase that has a much higher return than pre-made. More on that below.
Regulations
What legal constraints are their on your office building project?
As far as I have understood from my reading (and re-reading) of the regulations around garden buildings, in the UK you are allowed to build a structure of up to 30m² (with caveats - 15m2 without), at a height of 2.5m at the eaves and 4m to the apex of an A-frame, or 3m for a single pitch roof. All provided that you leave 1m from the boundary and the building is more than 10m away from your house and doesn’t take up 50% of the garden.
UK Garden Office or Building Regulations
“If the floor area of the building is between 15 square metres and 30 square metres, you will not normally be required to apply for building regulations approval providing that the building contains NO sleeping accommodation and is either at least one metre from any boundary or it is constructed of substantially non-combustible materials.”
Outbuildings are considered to be permitted development, not needing planning permission, subject to the following limits and conditions:
- No outbuilding on land forward of a wall forming the principal elevation.
- Outbuildings and garages to be single storey with maximum eaves height of 2. 5 metres and maximum overall height of four metres with a dual pitched roof or three metres for any other roof.
- Maximum height of 2.5 metres in the case of a building, enclosure or container within two metres of a boundary of the curtilage of the dwellinghouse.
- No verandas, balconies or raised platforms.
- No more than half the area of land around the “original house”* would be covered by additions or other buildings.
For buildings closer than that, the structure is limited to 15m². No sleeping is allowed in the structure. This is for reasons similar to the distance regulations, all to do with fire safety. Anything over these sizes, or supplied with mains water or drainage, or built in front of your house, require planning. Costs for planning can exceed £1000.
For those based in any other country, the zoning or planning regulations are up to you to research for now, but you can scale up or down this build depending on what they demand. It’s a simple timber frame that can be cut to size.
Another aspect I considered important is to talk to the neighbours. It will impact on them, so explain your plans and let them comment. My neighbours on all 3 sides were amicable and supportive after a few explanations.
What does it cost to build a garden office?
How much money does it make sense to spend on the build?
As of 2017/18, similar spec (30m2 footprint) pre-made garden offices cost from £12,000 to £20,000 and beyond. Small rented office space can cost from £1000 pa, plus rates, to £5k and beyond.
So spending £1-3k will ensure your home office pays for itself in just a few years, compared to a rented office, with benefits to your cashflow and house price. This can be between 5 and 15% according to some estimates (source: gardenrooms.co.uk) or more conservatively, 5% according to Move with Us director Simon King, which is the same as a new kitchen or cinema room. A new bedroom could bring around 10% for comparison (source: shedworking.co.uk). That equates to a 10k increase on a 200k house, or 15k on a 300k house. Keep your spend under that amount and you’ll be up as long as house prices continue to rise or stay stable.
With a cost of £700-1000/m2 for loft conversions or £1200-1600/m2 for additional rooms (RICS data), it means your ROI is at least 5x better with a garden building like the one described here, at £125/m2 for the 6x4m internal space or £100 for the full 6x5m footprint, if it boosts your property price by 5% compared to 10% for the former.
You can of course add to and increase the spec of your office in years to come, all at DIY prices, making it a space that can grow with you.
The budget in my case: £3k, for a 4x6m internal space, with a 1x6m deck. Estimate half to 2/3rds of this cost for a 15m2 office. You are also free to replace cladding, fittings and surfaces etc. to suit your style and needs to reduce or add to the budget.
Complete cost breakdowns for the office are available at the Guides, Cutting and Parts Lists page here. Most went on new materials such as timber, cladding, fixings etc. with a good chunk on plasterboard, plaster and flooring.
The electrics cost was reduced to very little because I’d done a kind of labour exchange with the electrician when he was building his extension. He gave up a fair few days to help me, for which I’ll always be grateful. Likewise my nephew and his friend came to help set up the footings, my father-in-law to put up the walls, and a friend of the family to help for a day too. Otherwise I was mostly on my own but the help was invaluable.
Eco aspects of building a garden office
All the timber was sustainably sourced, second hand items were used where possible and no concrete was poured. The doors/windows are double glazed, with only enough for adequate light to reduce heat transfer in or out, depending on the season. Heat is retained by the thermal/vapour barrier as well as the fibreglass insulation on the floor, walls and ceiling. Ongoing energy use should be low. The structure can be removed with little disruption to the land around it.
Further eco considerations:
https://en.wikipedia.org/wiki/Environmental_impact_of_concrete
When is the best time to start building?
Ideally you would start your build in the spring and have it done for the height of summer to take advantage of the weather. Failing that any time when the weather is warm will let you work outdoors in peace while you get the shell together. Unless working in the cold and wet doesn’t bother you! It’s easier to get friends out in the sunshine though…
If possible try to dedicate at least one or two weeks to the build to get it watertight. This will let you work on the inside in your own time. Bear in mind that dragging it out over weekends can be slower and cost more family time, but if that’s your only option then it’s certainly doable. I did a mix of both, starting in July, then having taken a week off work to focus on the office in August, then working back on weekends, then taking a month off the build (more or less) to work in September, then back on weekends in October.
Recap
The building I put together is 6x4m with a 1m decking at the front. It cost around £3000 and is a comfortable room that can be used all year round. Yours doesn’t have to be that size, of course and can be even half that size for quicker heating/cooling and a more cost-effective build.
Foundation options
Levelling
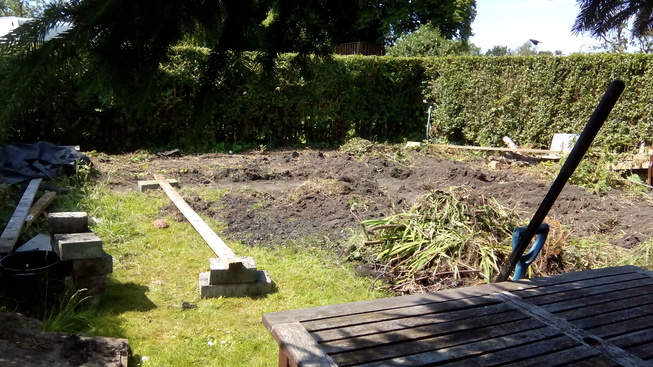
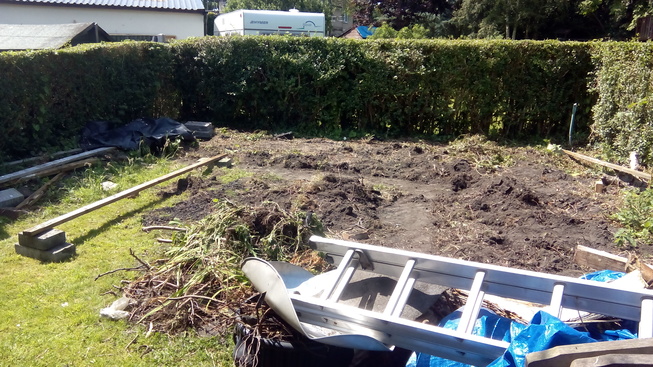
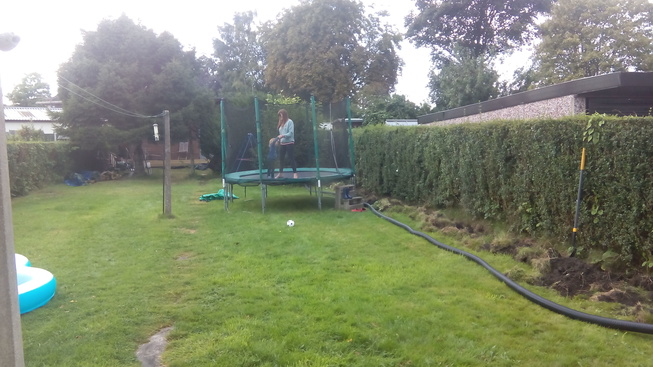
The space after a few days spent weeding and clearing
And from the other side, you can see a concrete garden path
What challenges are there on your land for a solid and level foundation?
A solid, dry and level foundation will ensure that your office stays standing for as long as it needs to and in any weather conditions. Taking any chances here risks ruining your hard work several months or years down the line. Even without planning permission, you still have obligations for a responsible build.
We need to think about spreading the weight, offering a solid base, drainage and footing options.
My case
I estimated that I moved around 5 tonnes of soil to bring the back of the garden down before I realised that I could have moved the front of the plot up for much less effort. Still, given the height of the front of the office it was probably a good idea to sink the whole area by 30cm so that it didn’t stand out quite so much.
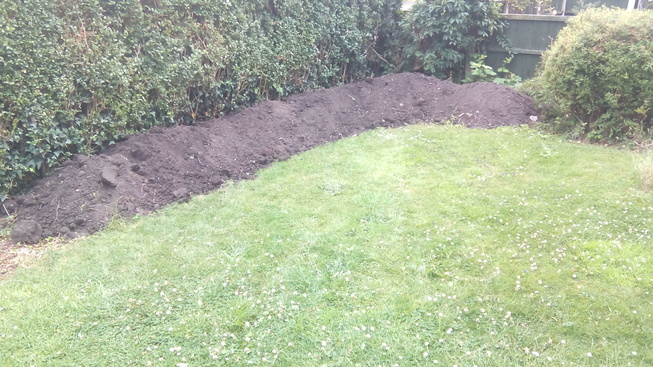
Around 5 tonnes of soil
Once the land was level I then started digging out the footings. Having borrowed a laser level, I set about trying to make sure that at least my base was going to be level. I managed to use the free classifieds to find enough gravel and hard-core to fill the base of each footing. I also managed to find around 40 concrete blocks to use as the pads. I did consider using garden slabs underneath the concrete blocks but for the amount needed I figured hard-core would be the easiest solution and would avoid more frozen ground movement if partially buried below the frost line.
The blocks only cost £1 each, however, so spending time looking for free ones wasn’t totally necessary, even if it did save £50.
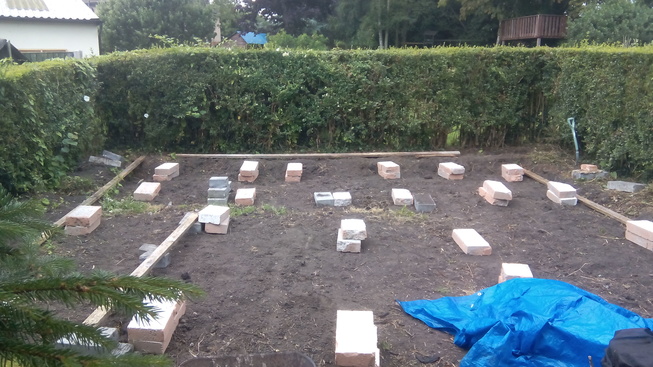
Rough first layout of blocks
There is a concrete garden path that runs like an L-shape across the plot so I used that as the lowest point to fit a row of footings on. From these I took the laser level and with the help of its owner, the electrician who helped so much on this build, I used a measuring tape to ensure the laser line always fell at 5 cm above the block. This is the height of the laser itself when sitting on the block. I used a tape measure off the top of the block to make sure the laser was at 5cm over the block each time. For fine adjustment, and again using an idea from the electrician, two concrete blocks were used per footing with a layer of mortar between. This mortar layer could be adjusted as required to get them level, just needing a few taps of the hammer to level, or more mortar if too low.
My 11 year old nephew and his friend helped me to mix plenty of mortar when preparing the base. We used approximately 1/2 a bag of cement that we had left over from work on the house several years before.
I ended up setting out the footings at 1.2m spacings left to right, and differing spacings from front to back. I figured front to back mattered less in terms of support because the flooring joists were the main supports and spread the load over them. With the thickness of joist I was using these would have even supported the floor if I’d have just had one footing at each end, as in some houses where first floor joists span wall to wall with no middle supports. So I thought 1.2m spacings would be plenty strong enough. But that didn’t take floor flex into account.
The one regret I do have is not spacing the floor joists at 600mm to make the floor more rigid and avoid the OSB layering that I ended up doing to compensate.
So I would recommend you set out at 600mm centres because it just makes more sense, and is the standard for a reason, even if it costs more in timber. It’s a better floor and might save layering OSB on top for stiffness, which can cost as much.
You also have the option of using angle brackets to secure the frame to the footings. This will depend on the weight of the materials, but in my case was not necessary. The office has stood through 3 x 50 mph+ storms (Irma etc.) and has not shifted an inch. By the time all the materials are in place it weighs a lot. But so does concrete, so attach it if you want extra peace of mind.
Alternative footing options
Piles / anchors
I did consider using PVC tubes filled with concrete/cement as piles to rest the building on but opted for the simpler pad footings. I didn’t want any timber to come into contact with the ground so the pile idea would have worked out in that way, but also involved lots of concrete, which I was trying to avoid. You might consider this if suitable for your land or building. Much easier to get the heights and levels right with your tubes before filling them than with the concrete blocks.
Concrete slab/raft
Not selected for cost, environmental and damp reasons. Concrete costs hundreds per square metre, and I have a lot of square metres to cover, takes weeks to go off, makes it hard to reuse the land and requires a course of bricks, further increasing complexity and cost. If you are certain that concrete is the right solution for you, it is the most stable and reliable base once in place. You will have to modify the plan to suit the timbers on top of your brick course and don’t forget your damp course membrane to stop water rising up from the concrete.
It may also be warmer than the footings/piles method, given that no cold air will blow underneath. But we have taken measures to counteract that using insulation and vapour barriers. It will be in contact with the ground, forming a thermal bridge, but it would depend on your circumstances as to which was warmer. In either case insulated floor will mitigate much of the risk.
If you opt for concrete, consider the water run-off situation, and incorporate a sensible drainage plan where appropriate.
Tools
To beg, buy or borrow (Amazon links):
Short spirit level - for electric sockets, quick checks
Long spirit level - for joists and longer spans
Long shovel - protect your back!
~90mm galvanised steel screws (from Screwfix in UK, got £3 for hundreds)
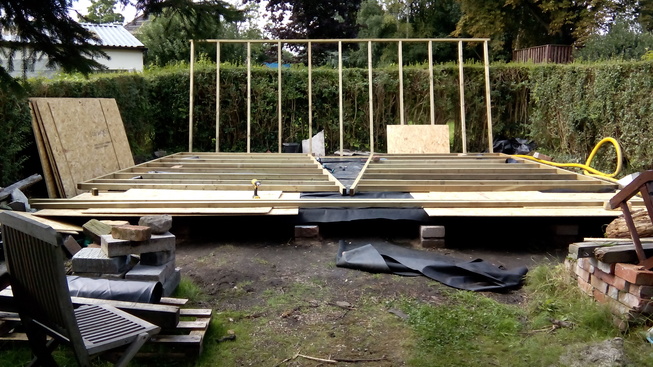
Base framing + decking
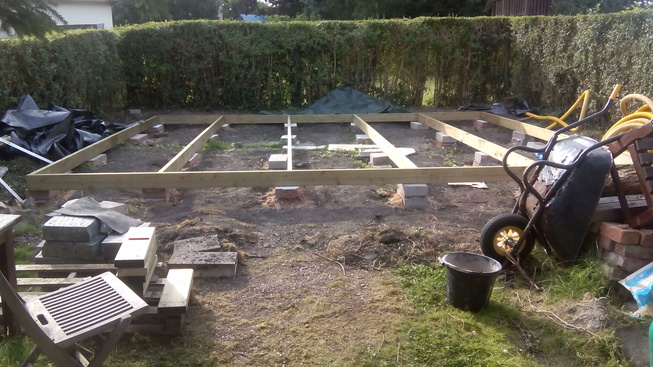
First frame joists laid
Starting to add the pre-cut noggings
Refer to the image. The dimensions are 6x5m total with 1.2m centres. Supported at several points by the concrete pads.
EDIT: This, like many parts of the original design, has been improved in the new “Model 1”. The frame, roof and openings were all checked over by a joiner of 25 years' experience and enhancements for durability were made at very little extra cost. All further info for that design is here: Model 1/1A guide and parts lists
Don’t skimp on your joists, use 6x2in (sorry to mix metric, imperial - welcome to UK 2017!) timbers that are strong enough to support plenty of weight.
Get the timber merchant to pre-cut as MUCH as possible. Longer lengths have higher per-metre cost. It was anything over 5 or 6m in my case. I didn’t factor this in and paid the price. Definitely avoidable.
Also non-obvious – prices are non-VAT (sales tax) for nearly everything. Except items in their shop. Get timber delivery person to help bring it round the back.
Pre-drill timbers at 3 or 4mm (4mm drill bits snap less… I went through 5 or so 3mm drill bits on angle work) before screwing. This makes sure that your timbers stay flush together with the best possible fixing.
Look for galvanised or stainless screws. You will get through more than you thought. In the UK screwfix do a good deal on stainless 90/100mm wood screws but they aren’t always available and need pre-ordering in many cases.
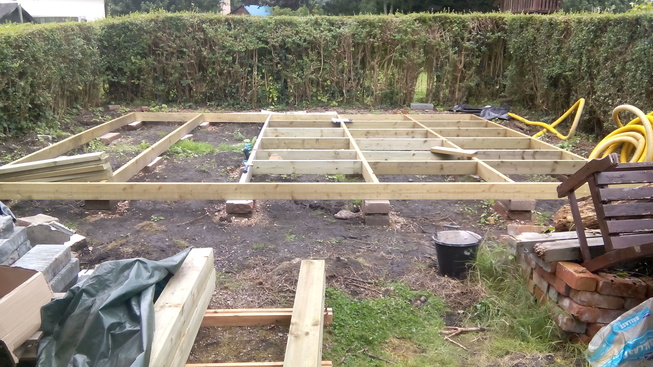
I had help getting square and level, as well as assembling but only took a few hours with an experienced person on hand. Good measurements, timber merchant pre-cutting, pre-drilling screw holes, these all help ensure a solid and robust frame.
Membrane under base to keep wind out and insulation in
I put membrane under the frame (pinned using staplegun) and filled with insulation – I got fibre glass in my throat, eyes… everywhere. No links to cancer found in my quick search for studies online, but if you want to spend more on insulation, rockwool or foil-backed foam are good options. They cost 2-4x more, however, and because I was using a lot, it didn’t fit into the budget. More on insulation below.
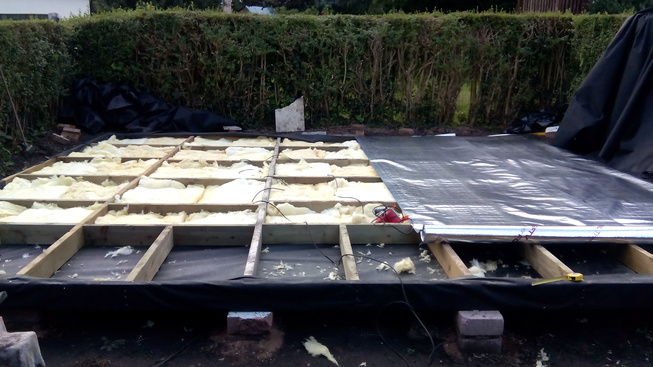
Starting to insulate the floor
Would be great if someone could message me if they know how to improve this flooring insulation setup - I was worried the foil vapour-barrier would make the insulation below pointless as no air or cold could get in anyway, but without the membrane and fibreglass below it would probably be colder and find a way to blow in… Belts and braces I thought. Also water gathering on the vapour barrier was a concern, so the edges of the barrier are folded back inwards and sealed to the inside of the building, under 3 layers of 9mm OSB.
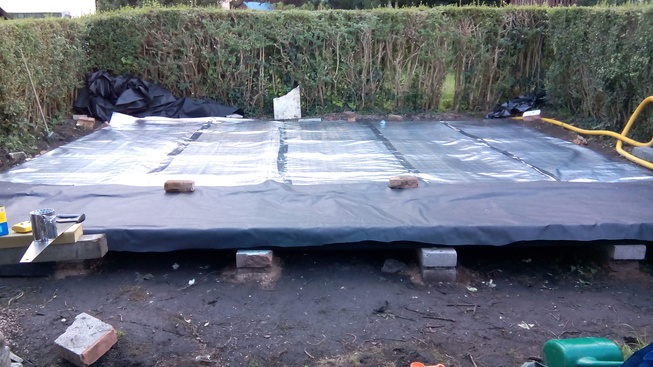
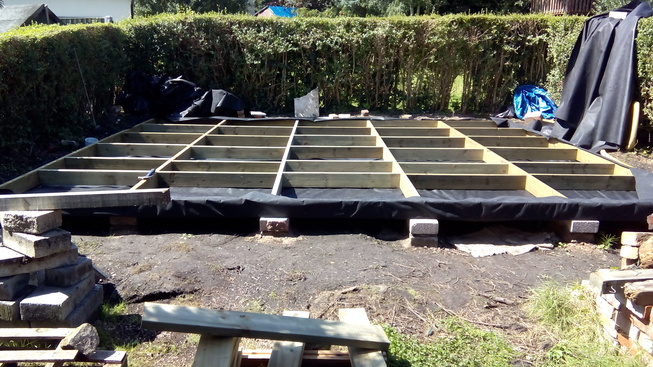
Base frame insulated - OSB next
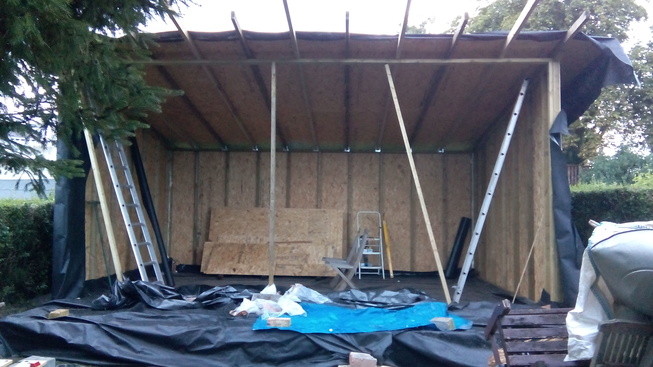
Wall raising
Needed help for this, made poles with reverse angled screws (think snake’s teeth) on them to hold them in place while we fixed them to OSB base and to each other.
Wall frames made in a day
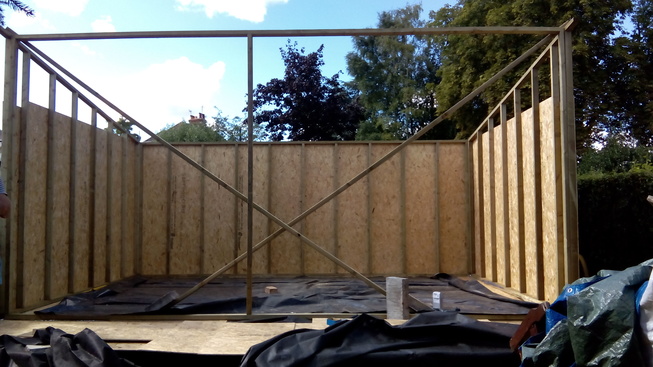
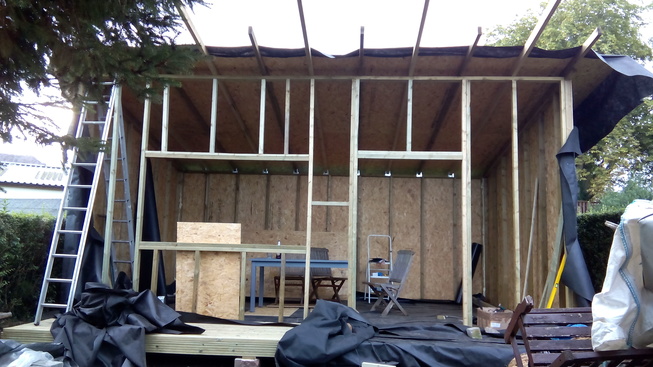
Walls UP
Decking done
Needed to build front into gap – most complicated wall involved 2x1m window and 1x2m door. Built all 3 side walls in one day, but it took a whole day to build the front one on its own.
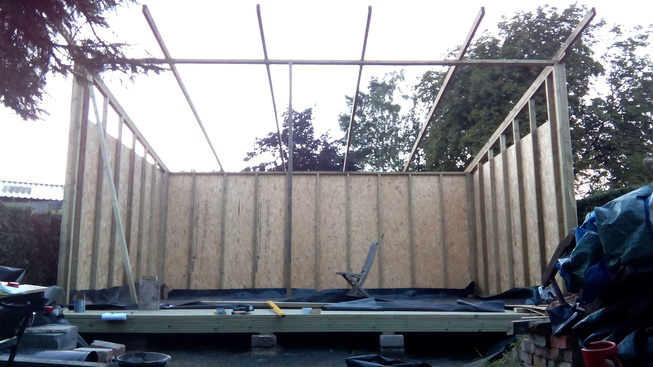
Roof laying
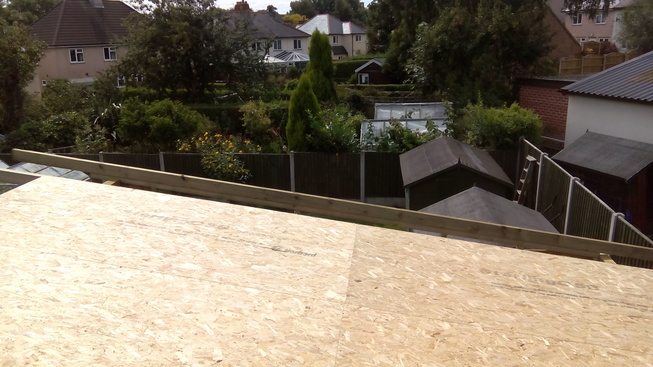
18mm OSB roof sheathing
Left overhang of 40-50cm at back. More at front to cover deck. Eaves – think about how much room you have to overhang.
Also had help getting roof rafters up – went back to get more rafters based on strong advice about 600mm centres, as should have done with the floor. A solid roof is somewhat important!
Had help on this day from a family friend, passing up remaining sheets, giving tips on overhang etc.
Had OSB covered with membrane for a few weeks before bought steel sheets for roofing – it just about survived with being stapled down and resting bricks on it. Had a few quite serious hurricanes and it all survived that first test. I did have visions of it ripping off and floating away, but it seems tough enough!
Shell UP!
Alternatives
3mm thick rubber pond lining I’ve heard some people use.
Wrapping and waterproofing
Staplegunned a donated no-brand membrane all around. Big thanks to Alan at https://www.space4work.com/ on that donation. The wrap will stop any water that gets through the steel from wetting the OSB sheathing below.
Tools
Windows and doors
Front wall framing took a day on its own, was fiddly
I decided to put doors and windows only on one side (the front) because a) we have neighbours gardens on both sides and B) I wanted to retain as much heat as I could, being in the U.K.’s climate. I also don’t mind a bit of darkness and still wanted the cinema effect.
The doors I bought second-hand from a place in Matlock from an online ad at a cost of £35. We sanded and painted them grey to match the window. They need a new lock.
The window I got from builder in Coventry who used the unit on his own house but decided they weren’t right for his kitchen, so they were only installed for six months. It was clean and in good shape and I got it for £50. It need new locks or I can just leave them because they’re quite secure when clicked closed.
Want more windows? More money and time. Consider focus on lighting instead.
I forgot to include the window sill, a separate piece, in the window opening measurement. Needed to take out a sliver of frame for that. Also mismeasured doorway and needed to sand it back quite a lot. Took many wasted hours. Measure way more than twice. And with the door attached. Don’t be cavalier about this bit. Lay them out on the ground, together, and measure carefully. Consider leaving a 5mm gap for hinges and space to move. Draught excluder can take care of minor gaps.
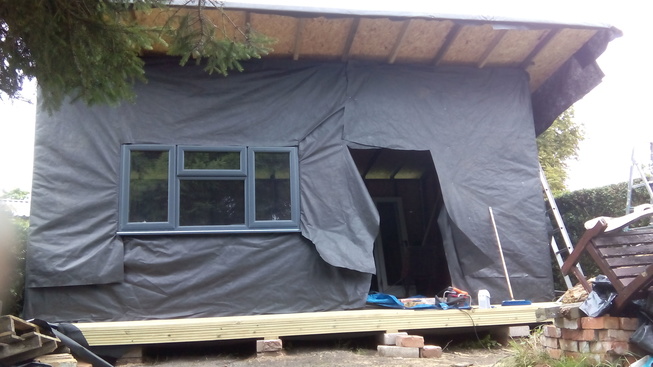
Window and doors in, finally, membrane tacked on
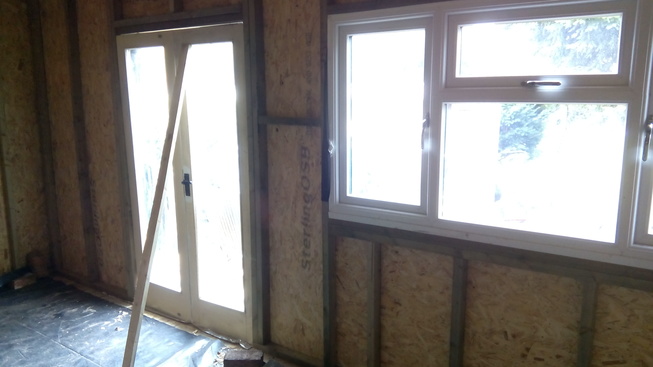
Back of window and doors
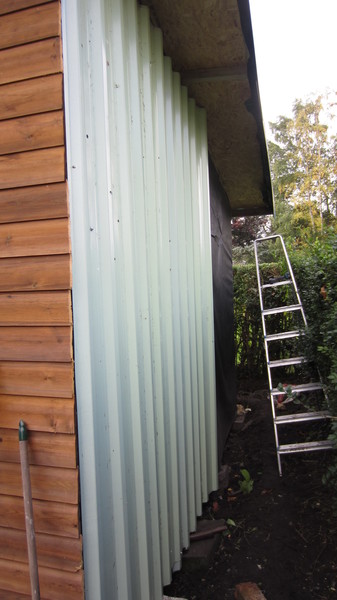
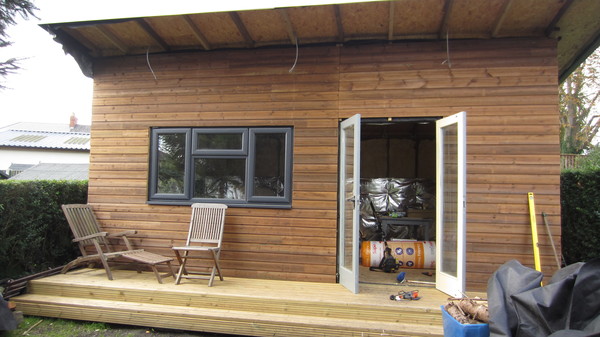
Garden office cladding options
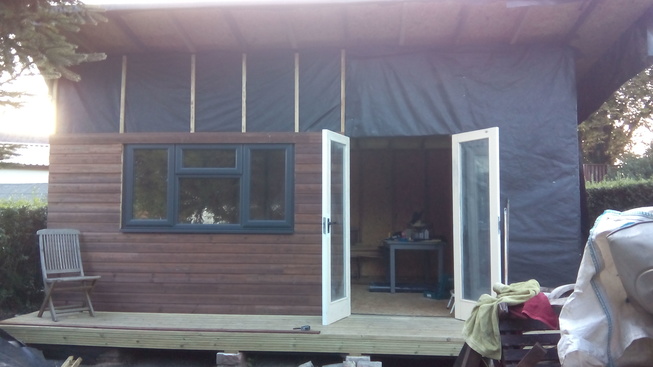
Cladding went on quite quickly, over battens into OSB
Went for weatherboard for a cheap frontage. Time consuming to apply but neat and low-cost from the timber merchant. I attached 3m battens into the OSBvertically, then used small copper nails to tack the weatherboard on at regular intervals. I had the nails from previous work on the house - here’s hoping they don’t go green and mark the front!
Alternatives cost up to £18 per sqm, which would have cost twice the cost of the entire build to clad all round. This can be done at a later date, funds and time permitting.
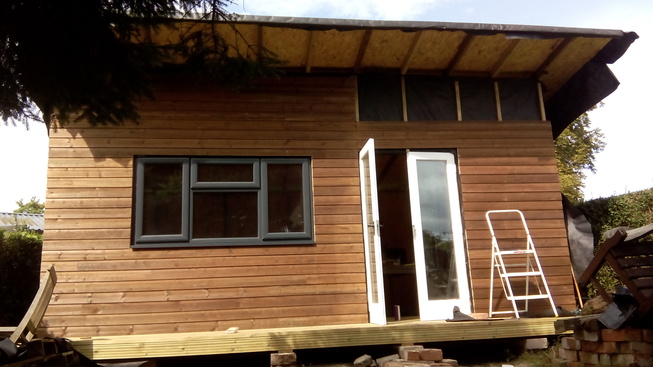
Weatherboard nearly done, had to go get more as under-ordered after cuts
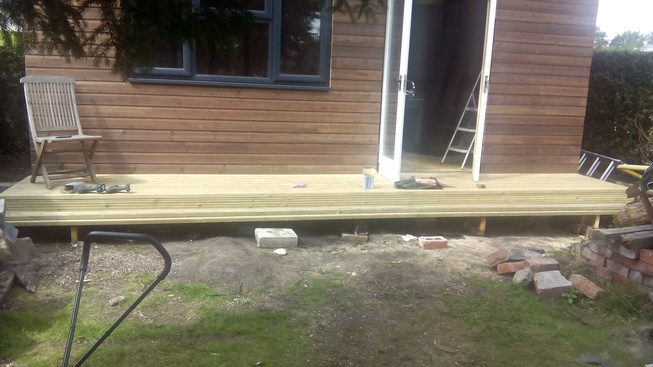
The decking step went on at this stage too, had to buy a few more 6m lengths when topping up on cladding
Electrics and internet
Trench for soak-away and cabling
45m roll of armoured cable used from house, aforementioned work exchange called in for wiring. This would usually cost around £500 to be done by a contractor.
Electrics and cabling went in the trench, along with land drainage which our garden needed (wrapped in geotextile so it doesn’t get clogged) so that’s just a separate additional cost of ~£60 that most folks won’t need. Our garden is at a low-point in relation to neighbours on all sides, so gets boggy in winter and holds water in storms. This should help direct and contain the water away from the lawn.
For the internet I’ve bought some fibre gear, while most people would be happy on wifi, I’m 30m away from the house. It’s still line of sight, but signal will be affected with uploads/downloads being ~1/5th of cabled speed. Ideally I want the fastest upload/dl speeds for business and trading, so dropped fibre cable (£20 - ebay) into the trench, along with CAT6 as a backup, that goes into a switch at this end and has a fibre to ethernet converter at house end.

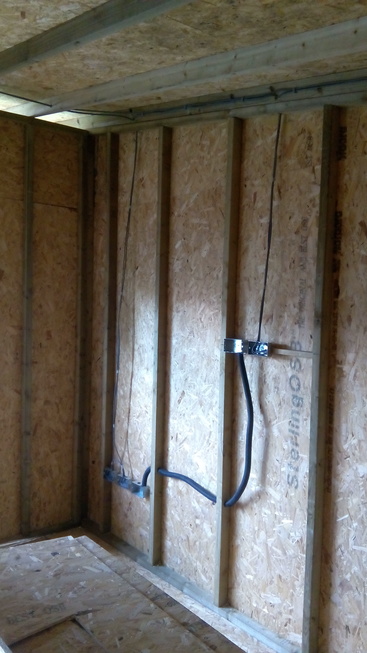
Electricity brought through roof joists
Wiring for the electrics went through the joists, high enough up to avoid plasterboard screws later. Noggings of wood to left of the above image are for the breaker box. Wires for an LED strip 2/3rds up the front wall and the room pendant light in the centre.
Socket locations were a double in each back corner, two at each front. One next to door to be used for outdoor things, one under window for radiators, on a separate spur.
Original plan to have wall-mounted TV saw us hide a conduit for the HDMI cable behind the wall and a socket midway up the wall
Opted against outdoor sockets, as we have extension cables and a socket by the door for those rare occasions. I did an extra wall piercing for my radio antenna to be added later.
3 light connections were also put in place, for deck lighting.
Get certificate for house sale and valid insurance
Wifi/Fibre/Ubiquiti etc.
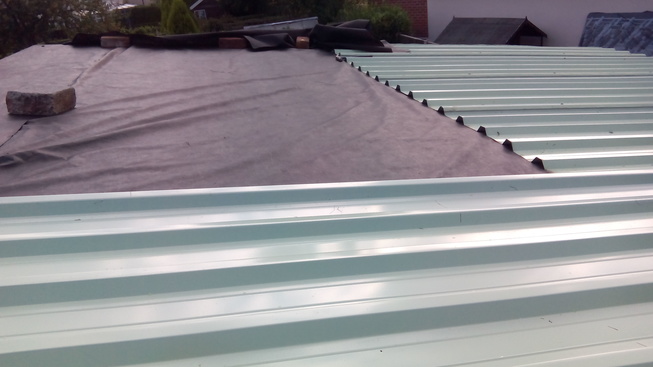
Roofing / siding
For the remaining 3 sides and roof, after using weatherboard on the front, I found box profile steel sheets for £10 a piece. ~30 of those and some edge pieces (flashing/drip edge) later - ones with rolled edges, for strength, were on offer - and hundreds of steel screws with rubber washers on later and we had a solid and waterproof roof.
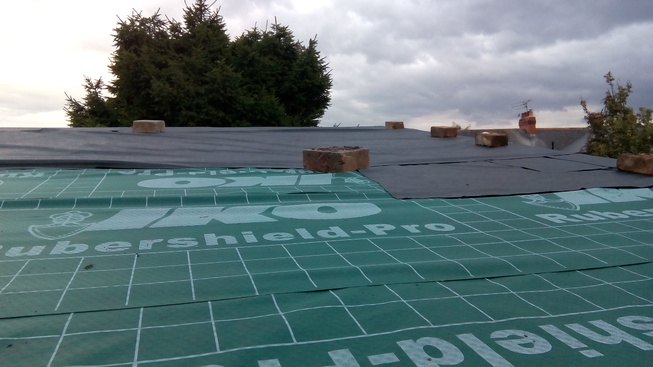
Breathable membrane
I was worried it would ping and ting in the rain, but with the insulation and other layers being all directly attached, no gaps between, any little noise there is is dampened to near silence.
Starting at the bottom, overlapping at the top by 60cm, with a silicon bead or two between and along side edges
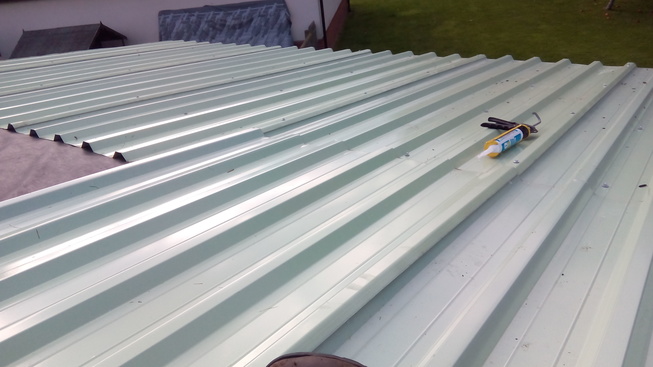
See that overlap - no rain creeping back up there!
It was in roofing and siding that I first got to meet the steel grinder, and get a feel for the different sizes of discs and pressure to apply when grinding. Cheap ones from Screwfix were great and whipped through the steel in no time. Thicker ones took a bit more ‘pushing’ and created more mess.
Needless to say, be careful on the roof. I managed to get the sheets up myself, but a work buddy would be useful here. Also don’t sit on the edges and overlaps. Easy to forget once covered…
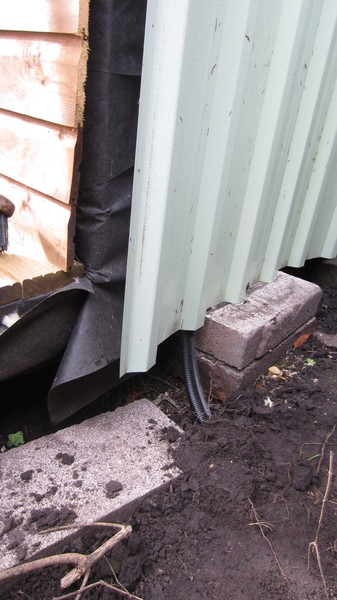
Siding where the elec and internet arrive
A little more siding
Insulation
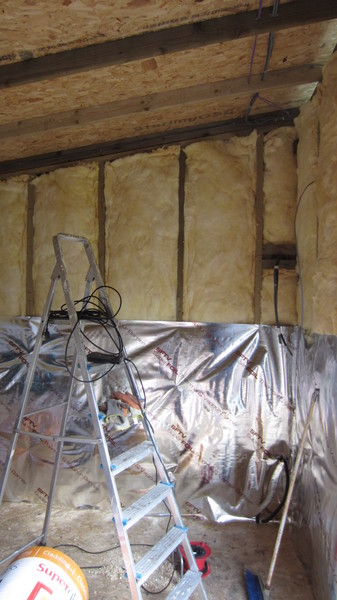
Filling in the walls
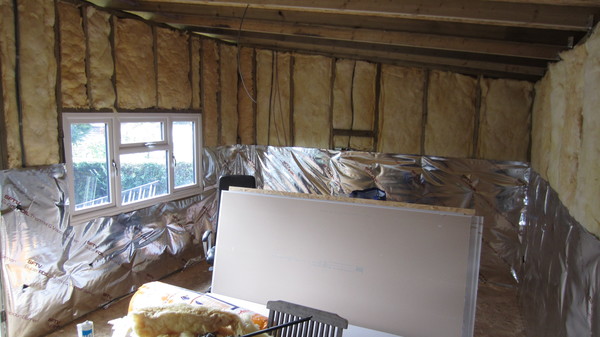
Wider angle
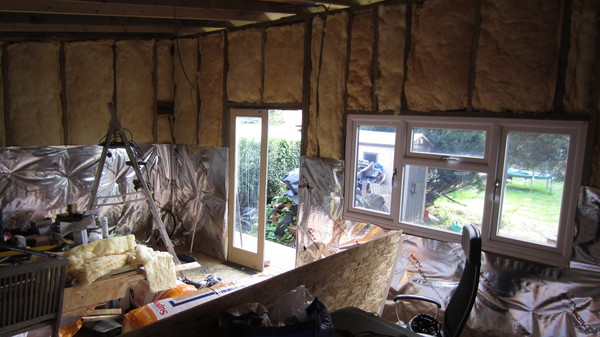
And the other way…
And the outside. Looking more complete than it is… That’s where it can get demoralising - stick with it!
After reviewing the many insulation options I came to the conclusion that fibreglass would be the most cost-effective, with equivalent R values to the more expensive foam board insulation (Celotex) or Rockwool.
It is very hard to find a good deal on large amounts of more expensive insulation, but it is very easy to find a good deal on fibreglass. One of my concerns was acoustic insulation, wanting to watch films and listen to music at high volumes without disturbing neighbours, and fibreglass also fits the bill here, deadening deep low sounds with ease. More so than foam insulation.
The major downside with fibreglass is that it is an absolute pain to work with. While easy to cut and position into place, the fibres get absolutely everywhere, covering your clothes and body and leaving you feeling like you’ve fallen through a stinging nettle patch backwards a hundred times.
I did look into whether there was a link to cancer after having a decent cough after working with it, but any studies I found showed no link. And this is studying people who’d worked with it on a regular basis. But do wear a mask because it really does stop the coughing. Or spend more of your budget on the foam or Rockwool type insulation.
For the roof insulation, when it wasn’t quite pressure-fitting into place, I used long screws set at angles to keep it in place. It wasn’t perfect, but it worked. Also consider wrapping wire around screws or using netting.
Tools
Fibre glass - From timber merchant
Vapour barrier
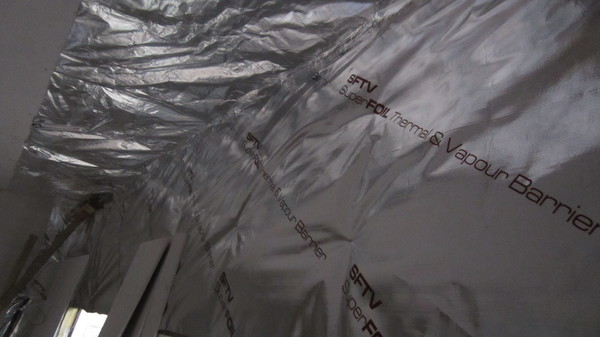
Space foil time
In my efforts to science the heck out of the build, I also looked into cost-effective methods to reflect heat back into the building. The question of vapour barriers can get quite involved, depending on your local climate and use case for the office.
If you are in a climate that is humid or wet outside, the goal is to keep the humidity out side of the building, but still let any internal humidity leave. Once you put a solid hundred percent humidity proof barrier in place, the risk is that you can create problems with condensation forming on the warm side of the barrier. This can lead to mould and damage.
The benefit is that no cold air can blow in and all of your nice warm air stays in. It’s just a question of where to position the barrier to avoid condensation issues and maximise heat retention.
Tools
Alternatives
If you have opted for foil-backed foam insulation then your vapour barrier is built-in. If you are thinking of using rockwool or fibreglass then your options are either to buy rolls of vapour barrier or to use foil backed plasterboard. Both come at a cost, and I think the vapour barrier rolls are more effective but slightly more fiddly.
Rolls of vapour barrier come in different quality levels. Having been sent the wrong size from a local supplier, I was forced to buy another roll and went to look for the most cost-effective on eBay. The one I ended up buying was £30 for 50m but was only single sided and was very thin compared to the higher quality one I had first bought, which was reinforced double sided and very thick.
The original supplier ended up sending out a full roll of the correct size at no cost, but it took them too long and I ended up using the cheaper roll.
Tips
Leave long enough flaps of vapour barrier over the base edge. I thought I had, but by the time I’d folded them back under the wall frames there was not enough for a consistent seal. Fortunately the frame sits tight, with plasterboard/plaster/skirting in front, but I’d have preferred to have been able to tape over that too for completeness.
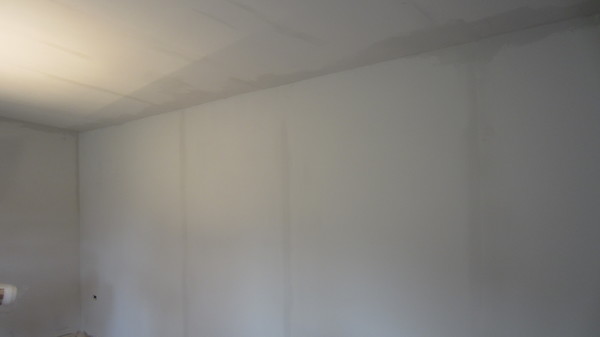
Plasterboarding or drywall
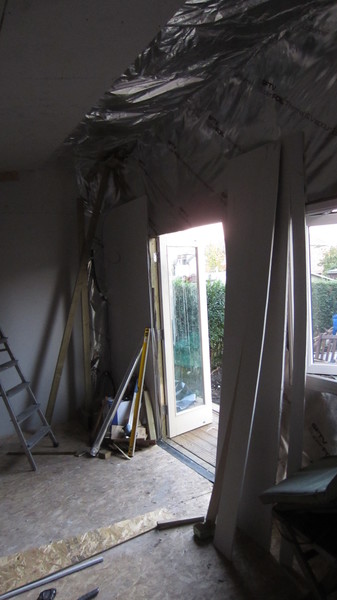
Walls were no trouble for one person, ceiling needs two
If you can get a plasterboard lift/hoist, do that. It’s so hard to get the boards lined up by hand with all the cutting and slight mis-measurements on a build like this. Use the lighter ceiling boards, don’t try to cut the big 12mm ones like I did. They weigh 22kg each and when they start to slide out of place from your hands or back… bad times. Go for lighter boards and use a platform or lift of some kind and your next job, plastering, will thank you. Going over gaps is a PITA. More tips in the plastering section below.
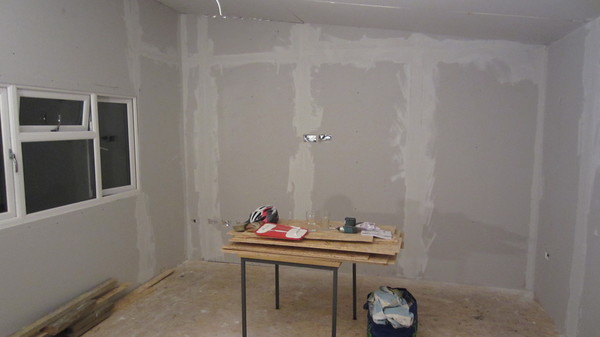
Got there in the end, then jointed the gaps
Missed a trick with studs on edges, caused problems with plasterboarding and potentially going through electrics as I fired nails in at angles into timber. Fortunately electrician put cables high enough to be clear. All tested on an RCD and individually.
See the makeshift supports on the far wall? Make sure you have a joist for your boards to go into… oops
Screws through electrics – real risk. Electrician had put double circuits on each, just for that. Didn’t end up needing it. I thought we might though with the trouble I had with the plasterboards.
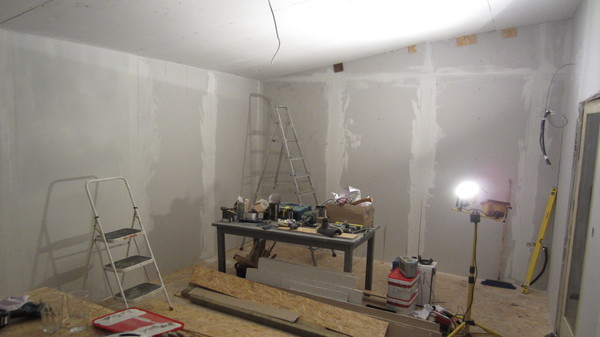
Plastering
The original plan was to call on a plasterer to get the job done in two or three days once I had boarded the inside. The plasterer I spoke to quoted for at least three days labour plus costs and wasn’t available until after Christmas, which was three months away. Everyone was trying to get their plastering done before Christmas, he said.
So I went back to my Plan B which I’d seen at the DIY store Wickes; tubs of premixed plaster. I did a little research online and ended up on a plasterer’s forum where several reports of its use were very positive and many of the forum members thinking it best to keep quiet about the product! Views on the Wickes site were also positive, with everyone saying how easy it was to apply. So I dropped by and picked up five tubs of Knauf Pro-Roll.
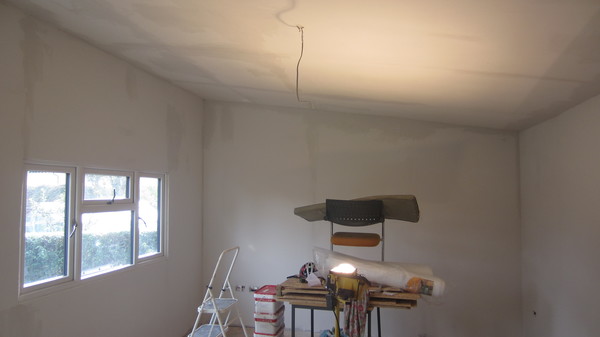
Result of 3-4 days of plastering. You can see the thicker areas still drying. Took a few days to go off everywhere.
I used the Lite version, in the red tubs. It cost £25 per tub. In the end I needed three more to add to this, given the size of the room, so ended up spending £200 on plaster. I was impressed with the finish and while some of the edges need neatening up and trim applying, the job was more than satisfactory.
The other side…
We have more trowell marks on walls in our home done by a professional plasterer in plenty of places. Weird thing is, I recognise the types of marks - edge of trowel, jittery row of lines… all stuff I tried to iron out that our pro in our home didn’t!
I still need to fill and sand certain areas, but I’ve been working in the office for over a month now and have been focusing on furnishings and fittings ever since. I might let some of the blemishes stay where they are for now. As it dries to a brilliant white, there has been no need to paint it either, so that was a saving in time over hiring a plasterer.
The downside of doing my own plastering was a lot of time and effort spent away from the family. It was probably 3 to 4 days to cover the whole inside. It was also the most tiring part of the build, especially when finishing on the ceiling. But I definitely felt more trim after putting the effort out. Smaller buildings will require less work on this front, of course.
A few tips for the plastering job
Make sure your plasterboarding work is neat and you have minimal gaps because these take a long time to smooth over, use a lot of plaster and can just about still be seen even after four or five passes. Even with scrim being used.
Pay close attention to the spacing between your roof rafters, as you can soon start to drift over longer distances when plasterboarding and end up with the board that doesn’t have a final rafter to fix into.
Make sure that every corner in the walls and ceiling offer a joist to the plasterboard. It’s very frustrating to have to use nails at 45° that have no guarantee of holding the 22 kg in place, and often just go right through it. I could rely on the fact that the edge boards had two joists to grab at least, with a so-so third at angles.
Hire a plasterboard lift if possible or call on more than one extra person. My friend Pete helped me to raise the ceiling boards using two ladders and a T-bar we made up. We struggled at times. Also consider the smaller thinner plasterboards for the ceiling, they will save you much heavy lifting and holding.
If you opt to use the Pro-roll then use a roller to apply an even and thick coat one board at a time and then trowel left-to-right until nearly smooth. Then let it go off for 15 or 20 minutes and come back to give a final finish. This will save some of the chasing of trowel marks that is so easy to get sucked into when the product is still wet. You can always sand off any remaining marks later, which is quite effective.
Flooring
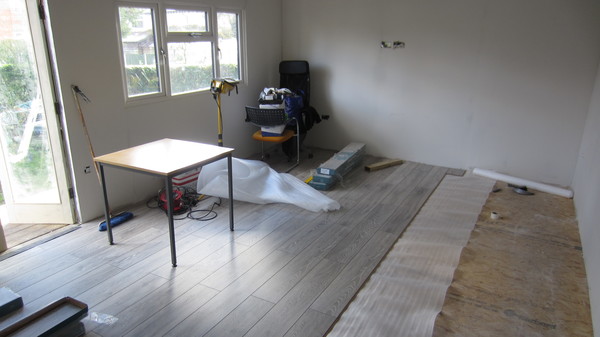
The floor went down quickly, with no glue needed on this kind
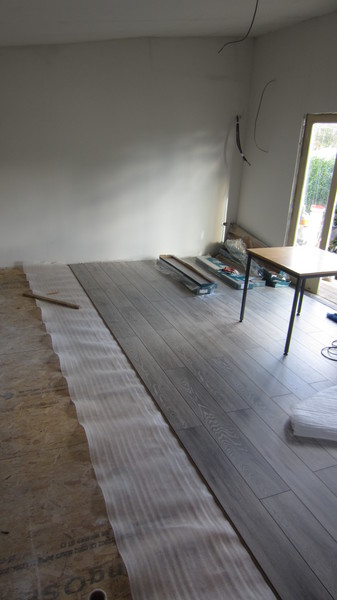
It added stiffness and insulation, as well as looking neater
Got a deal on a reasonably attractive laminate at £8/sqm. Laid the opposite way to OSB floor, trying to get some stiffness and for the least cuts. Something like 20 rows of 4 boards, came in packs of 9. 6x4 area cost £180 to cover, plus £15 basic white foam underlay (plus another I was given). Lay in a day, no glue required. You cut the end piece and use the cut-off to start the next row, giving you a stepped pattern so all the joins don’t end up lined up.
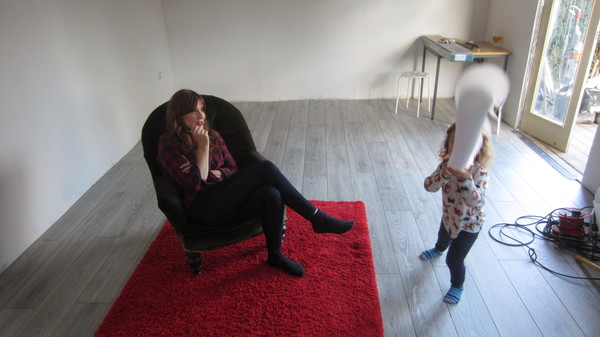
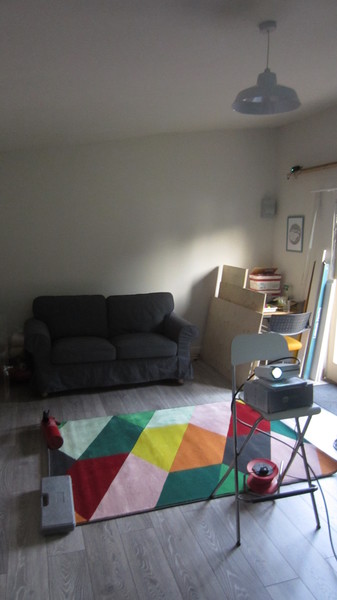
The decoration team soon moved in
Dropped skirting on top of that. £1 a metre, pre painted MDF.
There is a tiny bit of give in some areas of the room where my spacings were wide, but you don’t really feel it with the laminate on it.
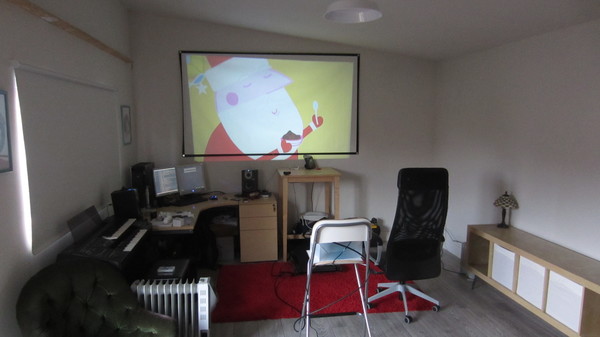
After dumping all the office furniture in…
Aaaand we’re in, start of November, in time for Christmas. After starting in July! The images I took are all timestamped, so I can see it was mostly weekends for those months, with one month ‘off’ to work, so 3 months of weekends you could say it took. A few full weeks of work with 2 people would be the equivalent.
The projector is now ceiling mounted, but this was test mode
That projector actually fills a whole wall if used from the other side, but at 3m away it fills a 100in screen. It’s only a cheap, entry level one, but sufficient for my needs. When 4k projectors become affordable, I’ll look at picking one up, but until then this looks very good and still gives that cinema experience. For £65 - currently on offer for £55. I used a 10m HDMI cable which needed rods and a few hours help from the electrician/wizard friend who helped with that and the power to it.
Tools
Laminate flooring - just an example
Alternatives
Resin covered OSB (tough to keep clean while building though). Tiles. Carpet. Engineered hardwood… Your call!
Lighting
I used an LED strip, 5m, offering 100s of colours. Red for stargazing (retain night vision) and orangey-red for warm backlight in the winter evenings.
I built a little platform for it to sit on, mounted on the wall. Nothing special but spreads the light out nicely.
There is a pendant light, but it gives a harsh and ugly central light. Then there are lamps in the corners that are much warmer.
Tools
Heating
Some options:
- Oil-filled radiator
- Infrared
- Stove or wood burner
I’ve ended up opting for oil-filled radiators after testing an infrared heater for a few days. Oil-filled does the job of heating the room up much better.
I would have liked to have built in a stove, but I just couldn’t bring myself to introduce fire into a timber building that children will most likely be playing in a fair bit in the future. Fumes, fire risk… I’ll pass for now, unless I find a portable burner or stove unit that can vent out the window.
Below are some examples of the insulation and radiator in action, on a snow-day for some extreme measurements. By our standards anyway - it doesn’t snow too often in this part of the world!
Snow day notes
Snow day 1: Around 0C outside, was 5C in the office with the small 500W heater having been on for 30 mins, so only just kicking in. The temp rose to 17C by 2pm with 1.5kw of oil filled. Should have just put the larger radiator on timer from 7am to speed that up.
End of snow day, 10C in the office at 11pm (11th Nov) and I’m leaving on the small heater now for the morning. So it loses heat at 1 or 2 degs an hour in this sub zero temp. Not too shabby!
Snow day 2: It was 8.6C in the office the following snow day morning after leaving the smaller 750w heater on from 11pm-9am. Might have helped to keep the worst of the cold out, but not too useful. Was -5C and beyond in the night though.
Back to 10C after 30 mins of 1.5kw also. Gives around 1.5 deg per 30 mins, or 3C per hour in these 0-5C outdoor temps. Speeds up as day goes on. Should be 16C in by 12pm. At 12.15pm it was 16.3 C. Another hour and we’re at room temp :) Seems the 1.5kw heater makes the difference. 2.10pm and 19.4C…
Snow day 3: next day (13th Nov) starts at 10C in here at 9am, small one on only since 7.30am, should be up to room temp much quicker. 5C outside. Now 12:30 pm and the office is 17.3, just the big one on for last 2 hours.
Cold day 4: Next day (14th Nov) 11C at 9.30am after only small one on. 3C outside.
Warmer 10C day, up to 22C by 12pm from 9.30am 1.5kw heater siwtch-on.
Warmer day (21 Dec) at 11C outside, office was 13.9 at 9.30am after 2 hours of 500W heater.
Tools
Extras, fittings and furnishings
We bought a blind from IKEA, tupplur, for £24. This is a blackout blind just over 2 m wide and it means I can use the projector during the daytime as well as provide a bit of privacy or sun blocking as required.
We did want the grey version of that blind, but it was sold out the day we went, or rather one was left but somewhere in the store. Didn’t realise I could buy it from Amazon at the time!
Rebecca made a curtain from old suit fabric that we hang on a curtain rail that we already had for a bit more insulation around the doors.
Projector - the entry-level Elephas we got works very nicely, and cost £65. Now it’s currently £55 so I’m hoping the top of the line models will come down soon.
Tools
Air conditioning
Consider a portable unit for summer.
Tools
Solar
Not done yet, but will set out how in another post if interest. Especially if you’re just using a shed or workshop. Or you could power a greenhouse heater if growing any plants in it.
Alternatives
Building your own from scratch can take months, so if you have the savings already and want to get working quicker, consider the following:
Buy one
Budget (£3-5k) ex-display from any of these companies (will be small)
Mid-range (£5-10k) - DIY kits
Top end (£10k+) - High end, high price!
Consider classified sites also for second hand sheds if you have good access to your garden to move it in in pieces. Ebay, preloved, etc.
Non-offices
Caravans in reasonable condition can be insulated and lined. No planning permission required. Much less work, much less money. Not the most attractive things, but functional.
Structured Insulated Panels, or SIPs, might be an idea for future builds - look into these as they become more accessible. Cheap, light and well insulated, you could have your build done in no time.
The end
Thanks for reading! Now grab some tools and get building :)
You can also now buy the complete guide and parts/cutting list for the building at the Gumroad page, if that saves you time! There are 3D plans, cost lists, walk-throughs and all you’ll need there.
Let me know via the email link below if you have any suggestions or questions. I ’ll add anything that’s asked a few times or seems important to the post.
PS - This post was featured over at shedworking.co.uk, where you’ll find many other examples of similar buildings!
PPS - The post had a little wave of press coverage in March 2021, with Country Living, The Express, Real Homes and a few smaller sites picking it up. Hopefully that’ll lead to a few more visits here, with more self-builds going up!